Deploy Your Game Server to the Cloud in an Afternoon

Need to share a game server or API with friends for early testing? This guide shows you how to go from a locally running server to one accessible from anywhere.
This is useful as the "napkin sketch" phase of deployment. It's perfect for early testing and iteration, but you'll want to graduate to a more robust solution before launching to real users.
Multiplayer games are at the center of our specialization here at Rushdown. When you're ready for production ready solutions, check out some of Rushdown's guides in the "Globally-scalable Game Servers in an Afternoon" series:
Why Deploy Directly to a Virtual Server?
When you're in the early stages of development, speed and simplicity matter more than scalability. This guide uses a straightforward approach: rent a small virtual server, copy your code over, and run it.
This approach is ideal when you:
- Need to test your server with friends or teammates quickly
- Want to iterate rapidly without complex deployment pipelines
- Are working with a prototype or proof-of-concept
- Want to spend cents per day instead of maintaining minimum infrastructure costs
This approach is NOT ideal when you:
- Need to handle production traffic or more than a few concurrent players
- Require automatic scaling based on player count
- Need geographic distribution across multiple regions
- Want zero-downtime deployments
What you'll deploy: We'll use a simple multiplayer game server written in Go as our example, but these techniques work for any server application you want to test in the cloud.
What You'll Need
Local machine:
- Go 1.24 or later (download here)
- Raylib for Go (installation instructions)
Cloud hosting:
- A DigitalOcean account (sign up here)
- Cost: ~$0.05 for this tutorial if you clean up afterward, or $4/month if left running
- Note that new DigitalOcean accounts get $200 credit for 60 days as of writing
Test the Server Locally
First, let's verify everything works on your machine.
Clone the demo repository:
$ git clone https://github.com/Rushdown-Studios/DigitalOceanGameServerDemo.git
$ cd DigitalOceanGameServerDemo
Start the server:
$ go run ./cmd/server/
Output: 2025/12/11 12:31:07 Server listening on :9000
In separate terminal windows, launch the clients:
# Graphical client (use WASD to move)
$ go run ./cmd/client

# Automated test client
$ go run ./cmd/mockclient
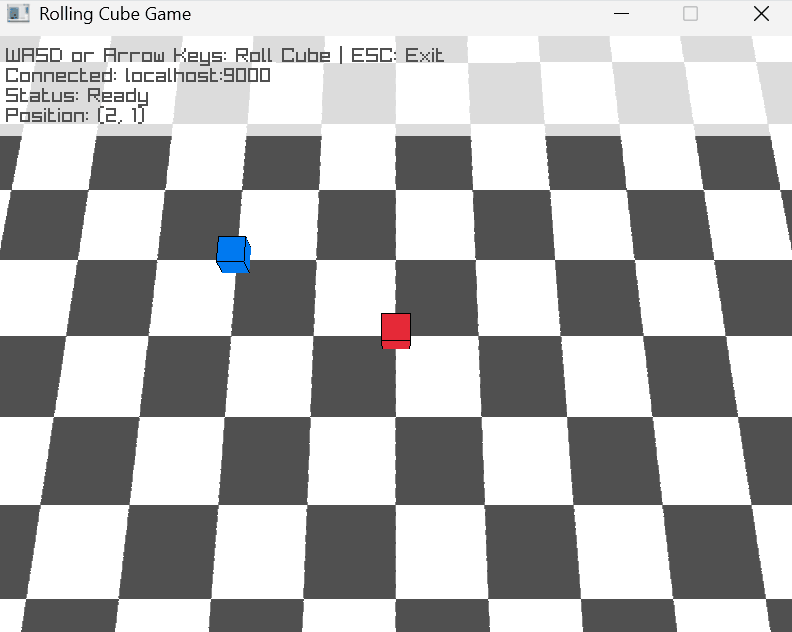
You should see a simple multiplayer game where you control a cube on a grid. If you've played Dispatch, this might look familiar.
Create Your Cloud Server
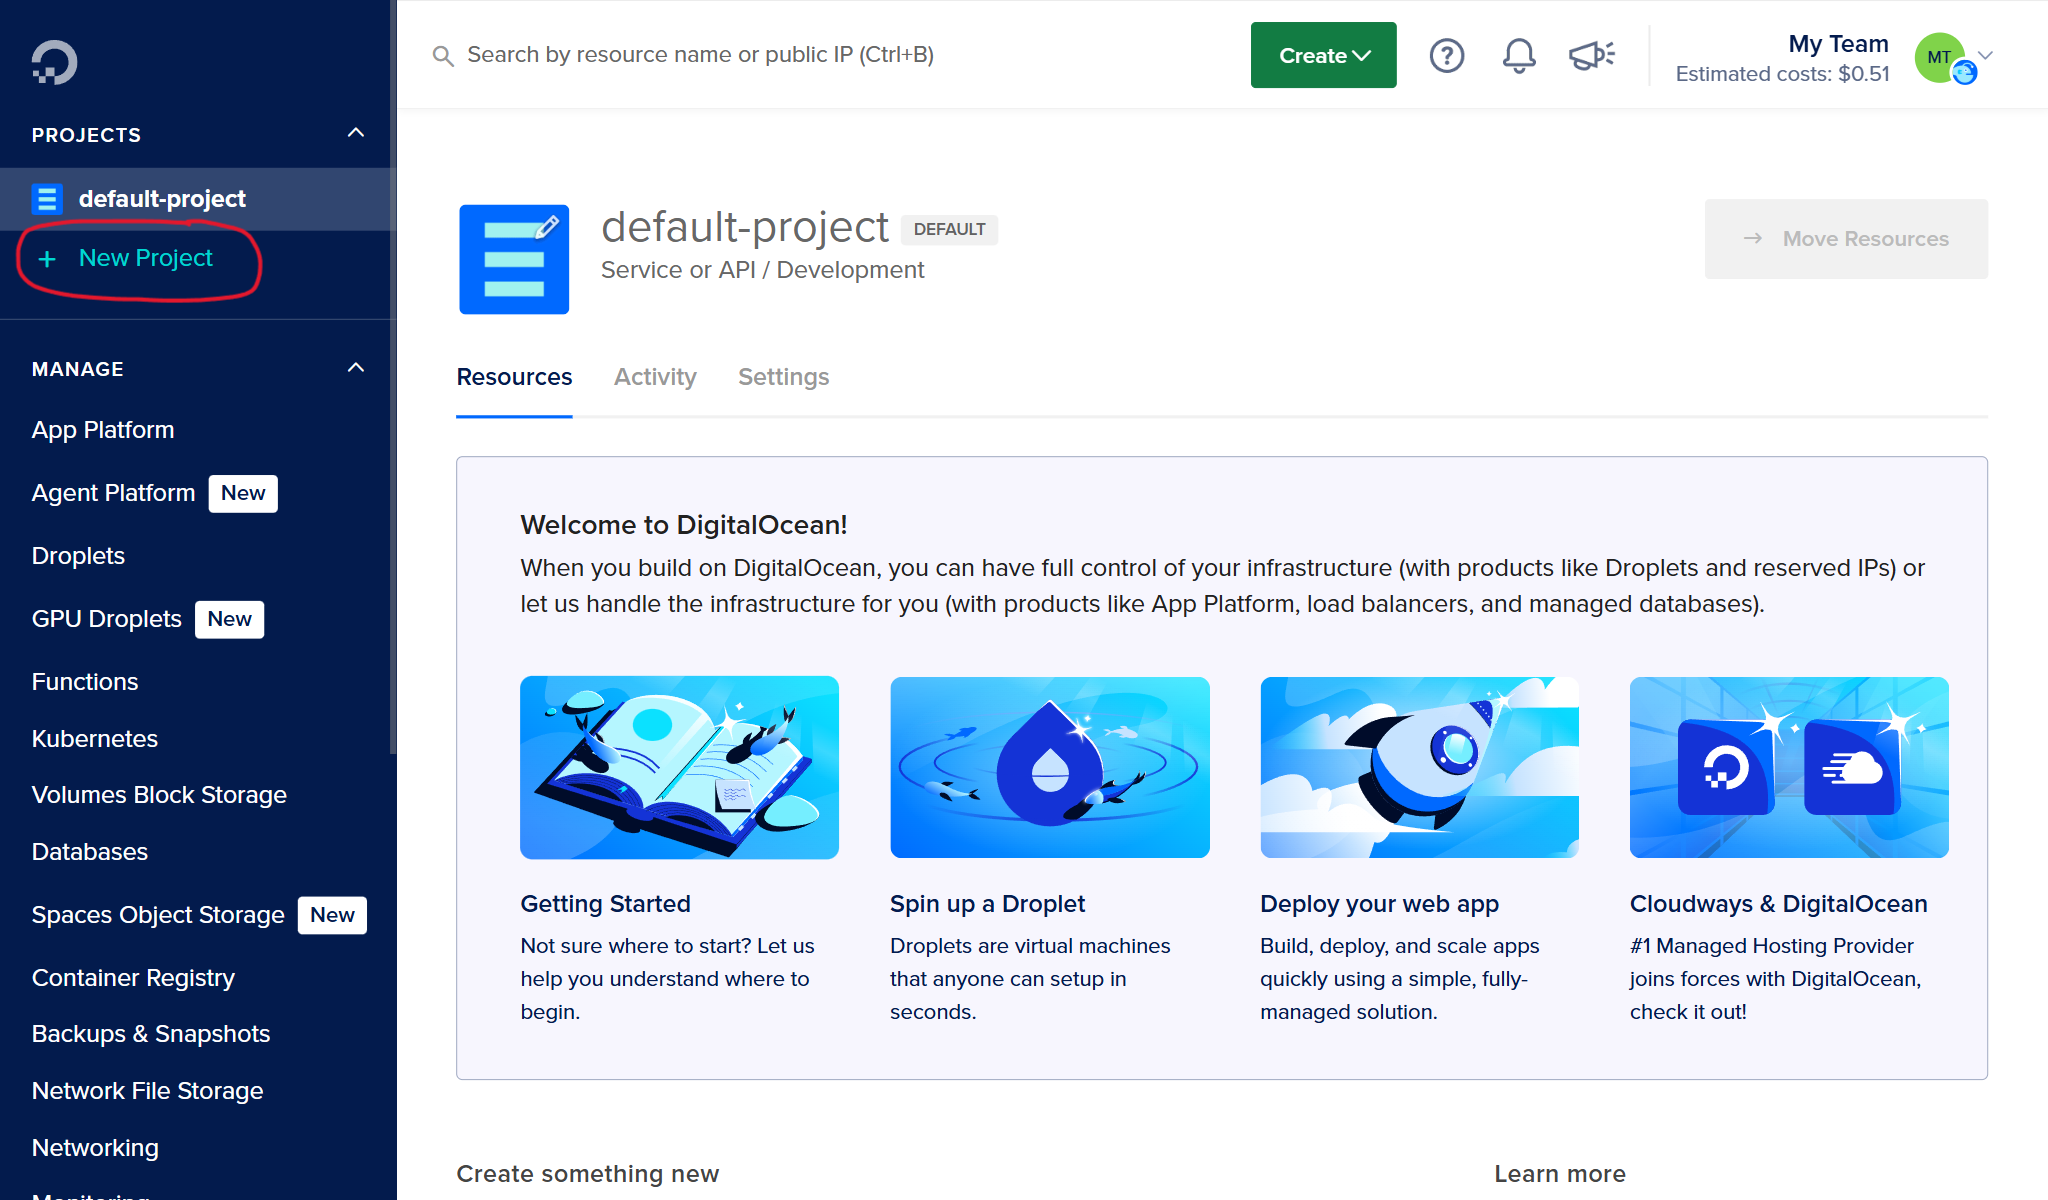
Log into DigitalOcean and create a new project to keep things organized:
- Click Create -> Projects
- Name it (e.g., "Prototype Deploy Demo")
- Choose "Web Application" as the project type
- Click "Skip for now" when asked about moving resources
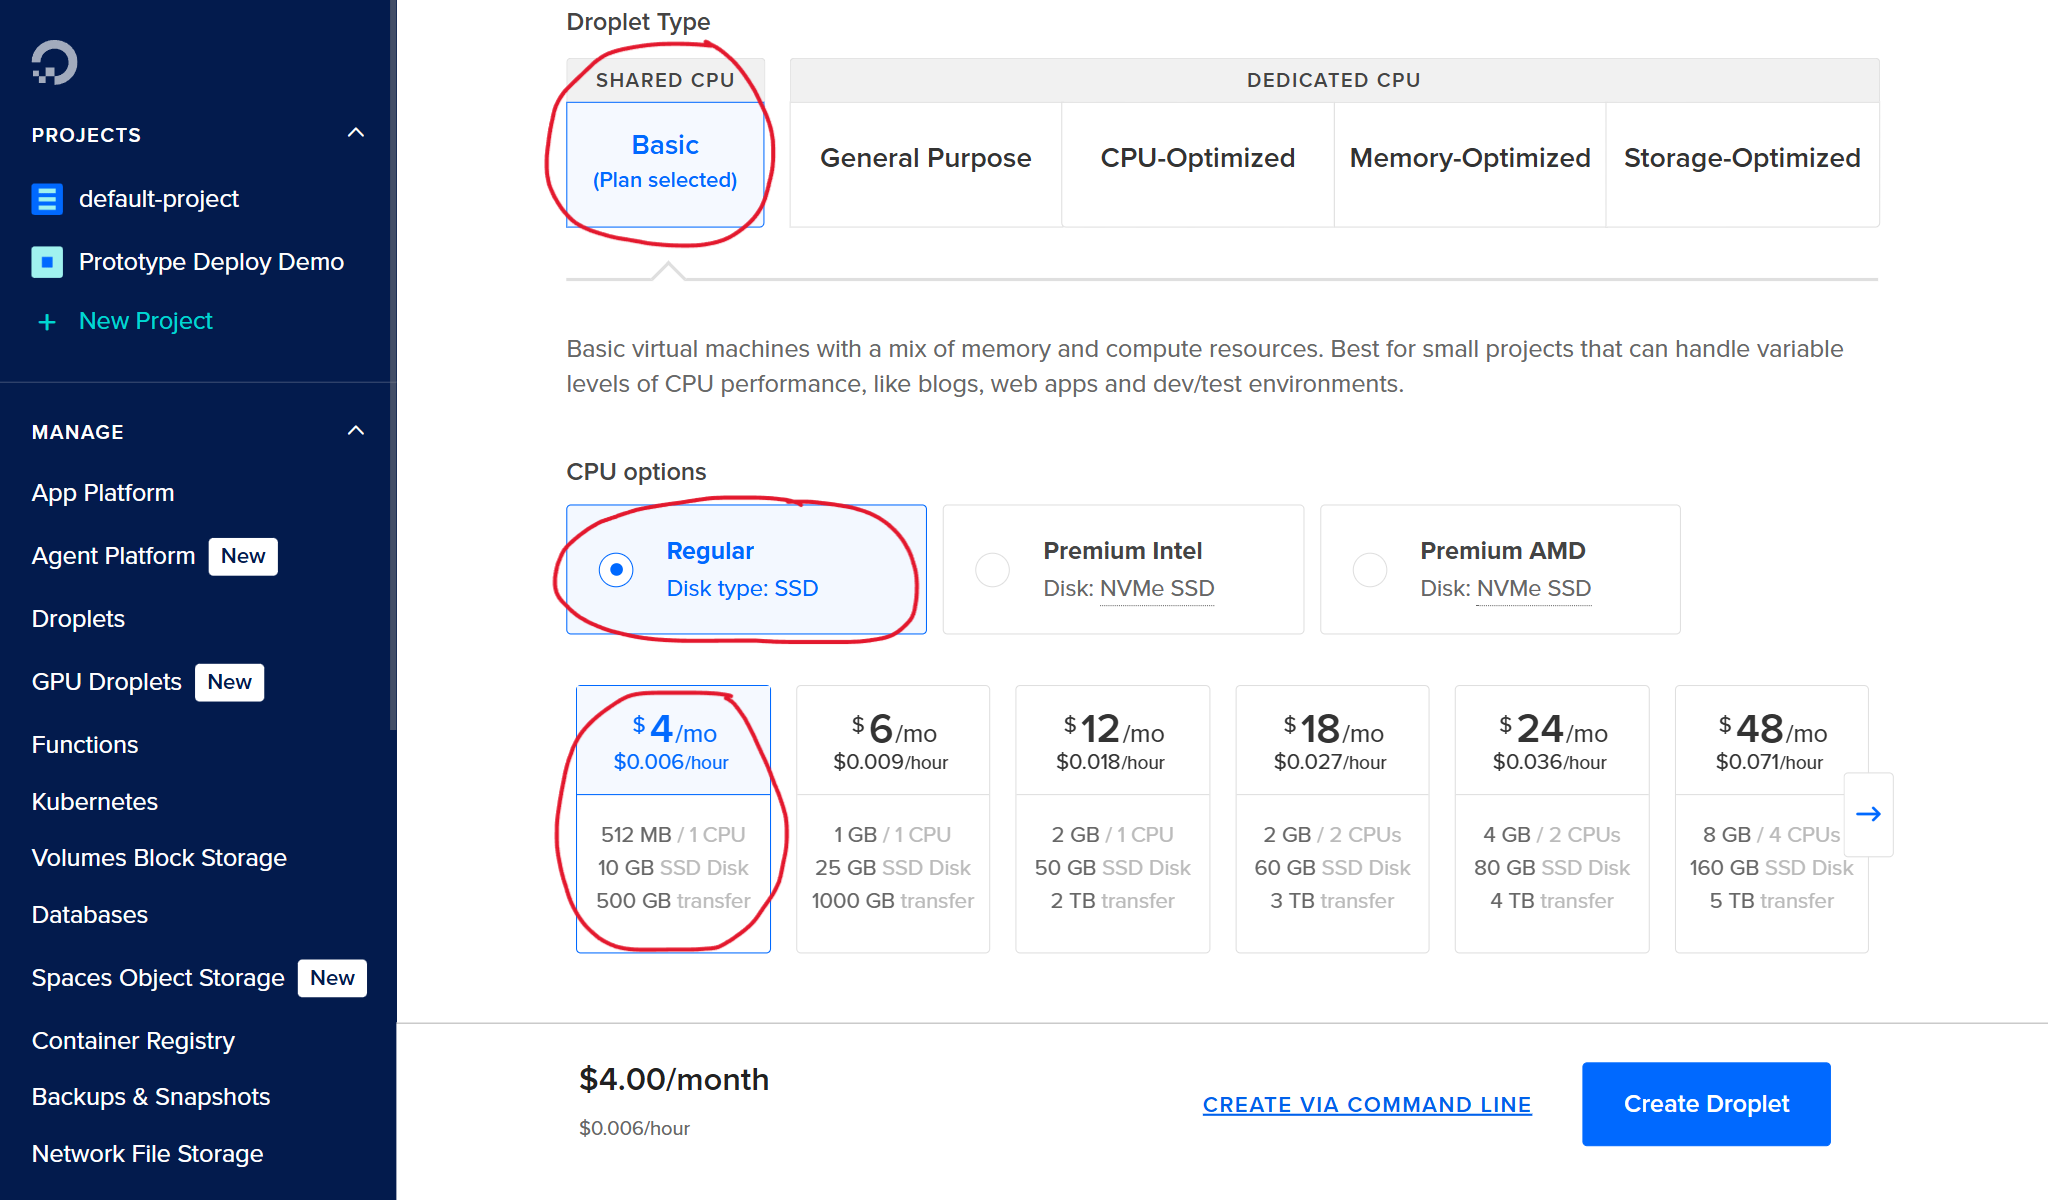
Now create a Droplet (DigitalOcean's term for a virtual server):
- Click Create -> Droplets
- Image: Ubuntu 22.04 (LTS) x64 (the default)
- Droplet size: Basic plan -> Regular -> $4/mo (512MB RAM, 1 CPU)
- Region: Choose the one closest to you
- Authentication: Add an SSH key (strongly recommended) or set a root password
Why use SSH keys? They're more secure than passwords and make connecting to your server much easier. See DigitalOcean's SSH key docs for setup instructions.
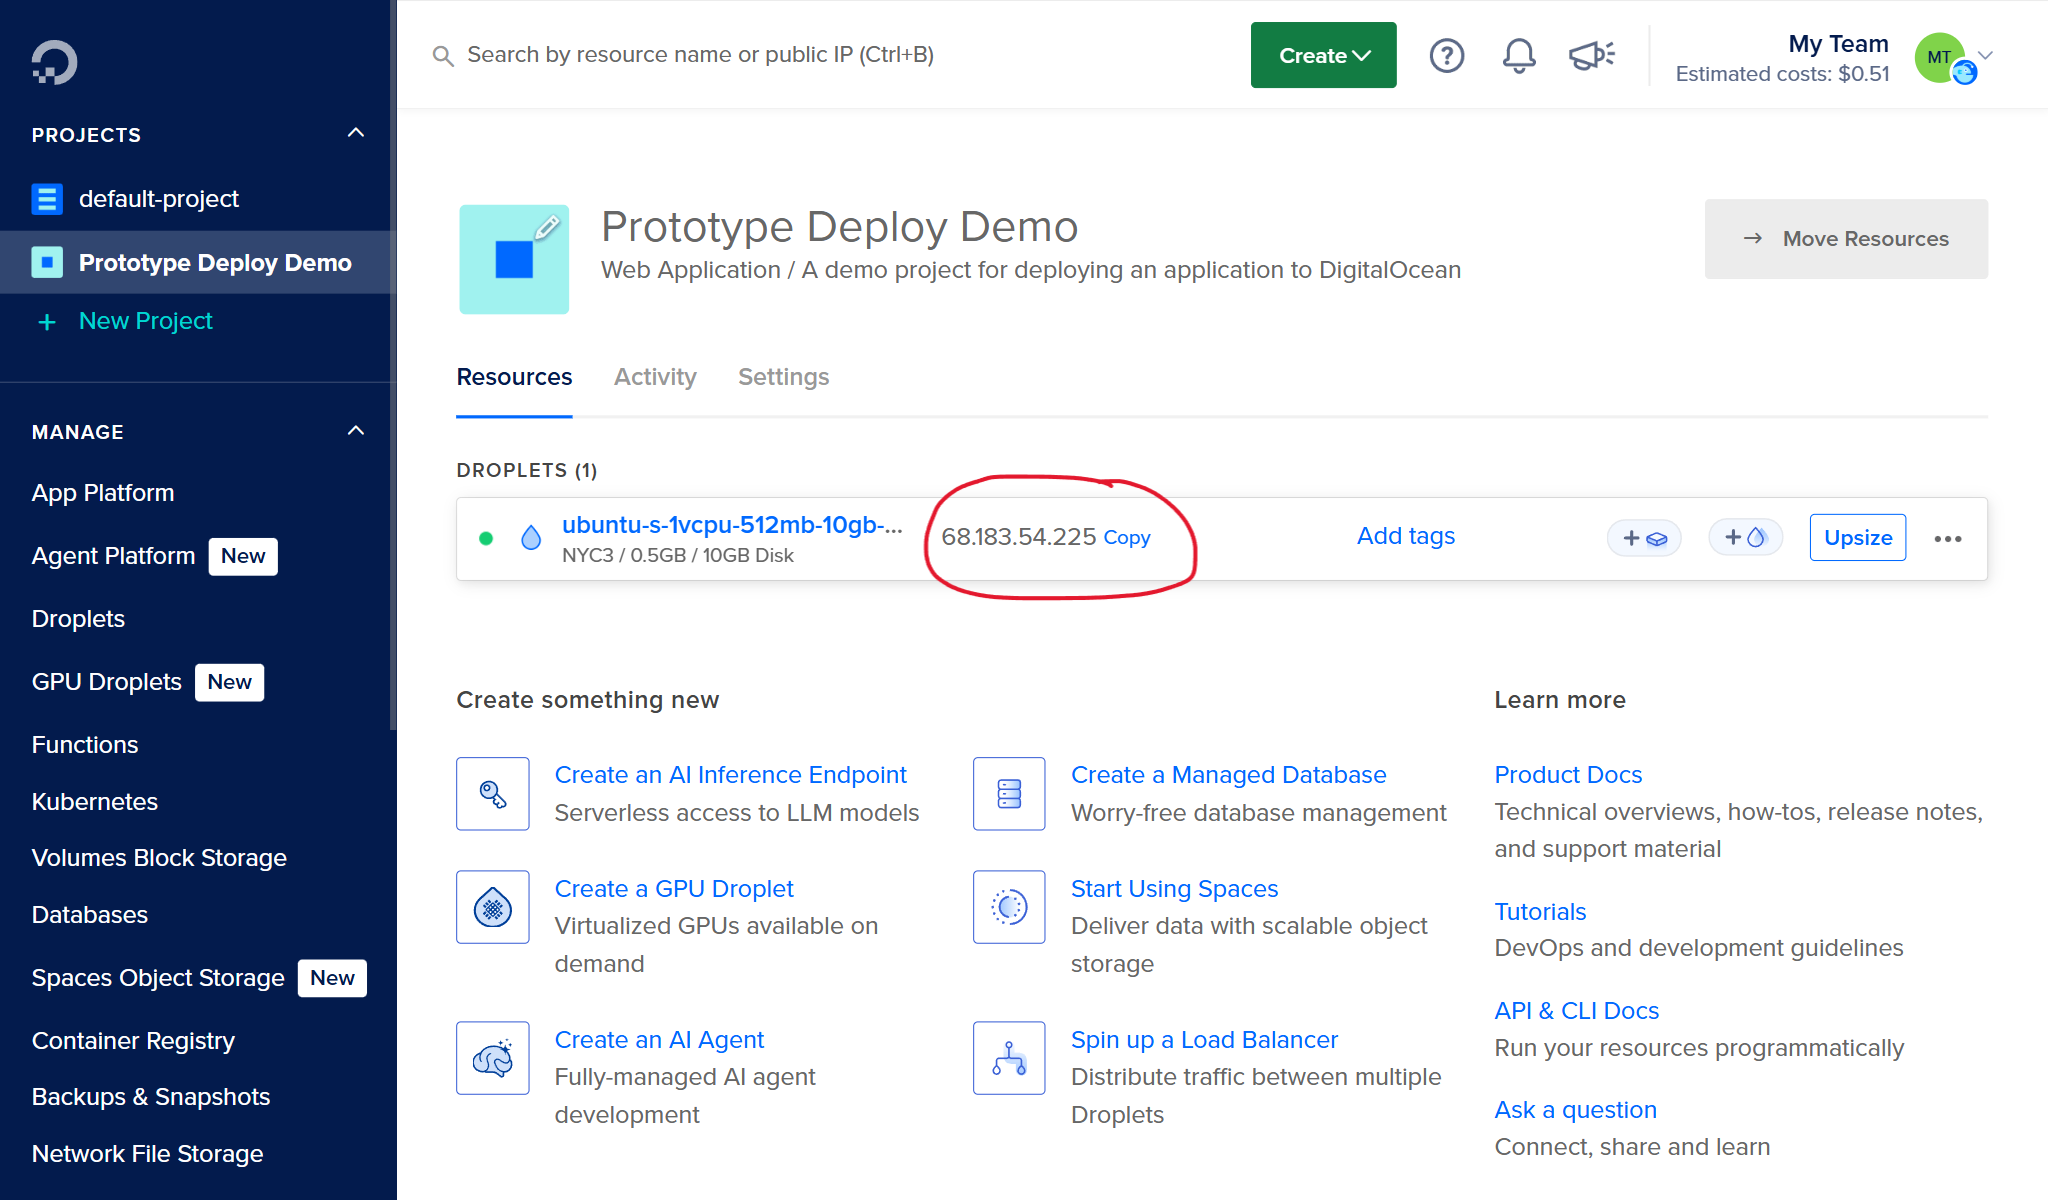
Click Create Droplet and wait 1-2 minutes for it to spin up. Once ready, note the IP address. You'll need it throughout this guide.
Connect to Your Droplet
Connect via SSH:
$ ssh root@YOUR_DROPLET_IP
root user for simplicity, but this is not secure for real deployments. The root user has unlimited privileges. If compromised, an attacker has complete control of your server.For production use, create a dedicated user with limited permissions to run your game server. See DigitalOcean's guide on initial server setup for instructions on creating users, configuring SSH, and setting up a firewall.
First-Time Setup
Before deploying your server, you need to configure systemd to manage it. systemd is Linux's built-in service manager that handles starting, stopping, and monitoring long-running processes. By creating a systemd service, your game server will automatically start when the Droplet boots and restart if it crashes.
The repository includes a pre-configured service file at gameserver.service. Copy it to your Droplet:
$ scp gameserver.service root@YOUR_DROPLET_IP:/etc/systemd/system/gameserver.service
Connect to your Droplet and enable the service:
$ ssh root@YOUR_DROPLET_IP
root@YOUR_DROPLET_IP $ systemctl daemon-reload
root@YOUR_DROPLET_IP $ systemctl enable gameserver
The enable command configures the service to start automatically on boot. You don't start it yet, we need to deploy the server binary first.
Build and Deploy to Your Droplet
Now let's build your server and get it running in the cloud. The repository includes helper scripts that handle cross-compilation and deployment.
Build the server binary for Linux:
$ ./scripts/build.sh
This compiles your Go server for Linux amd64, regardless of your local operating system. The binary is saved as gameserver.
Deploy the binary to your Droplet:
$ ./scripts/deploy.sh YOUR_DROPLET_IP
This script copies the binary to /usr/bin/gameserver on your Droplet and restarts the systemd service.
Verify the server is running:
$ ssh root@YOUR_DROPLET_IP
root@YOUR_DROPLET_IP $ systemctl status gameserver
You should see Active: active (running) in green. View the live logs to confirm it's working:
root@YOUR_DROPLET_IP $ journalctl -u gameserver -f
You should see output like:
Dec 18 14:22:31 gameserver[1234]: 2025/12/18 14:22:31 Server listening on :9000
Press Ctrl+C to stop viewing logs (the server keeps running in the background).
Connect from Your Local Machine
Back on your local computer, connect your clients to the cloud server:
# Graphical client
$ go run ./cmd/client/ -host YOUR_DROPLET_IP

# Mock client (in another terminal)
$ go run ./cmd/mockclient -host YOUR_DROPLET_IP
You should see your client connect. Check the server logs to confirm:
root@YOUR_DROPLET_IP $ journalctl -u gameserver -n 20
You should see connection messages like:
Dec 18 14:33:56 gameserver[1234]: Client mock-1765481635182961600 connected at (0, 0)
Dec 18 14:33:58 gameserver[1234]: Client 1765481636434193300 connected at (0, 0)
Your server will now stay running even if you disconnect from SSH or reboot the Droplet.
Updating Your Server
As you make changes to your code, deploying updates is straightforward. Rebuild your server and run the deploy script:
$ ./scripts/build.sh
$ ./scripts/deploy.sh YOUR_DROPLET_IP
The deploy script automatically stops the running server, copies the new binary, and restarts the service. Your server will be offline for a few seconds during the restart. If players are connected to the server, they will be disconnected.
Clean Up
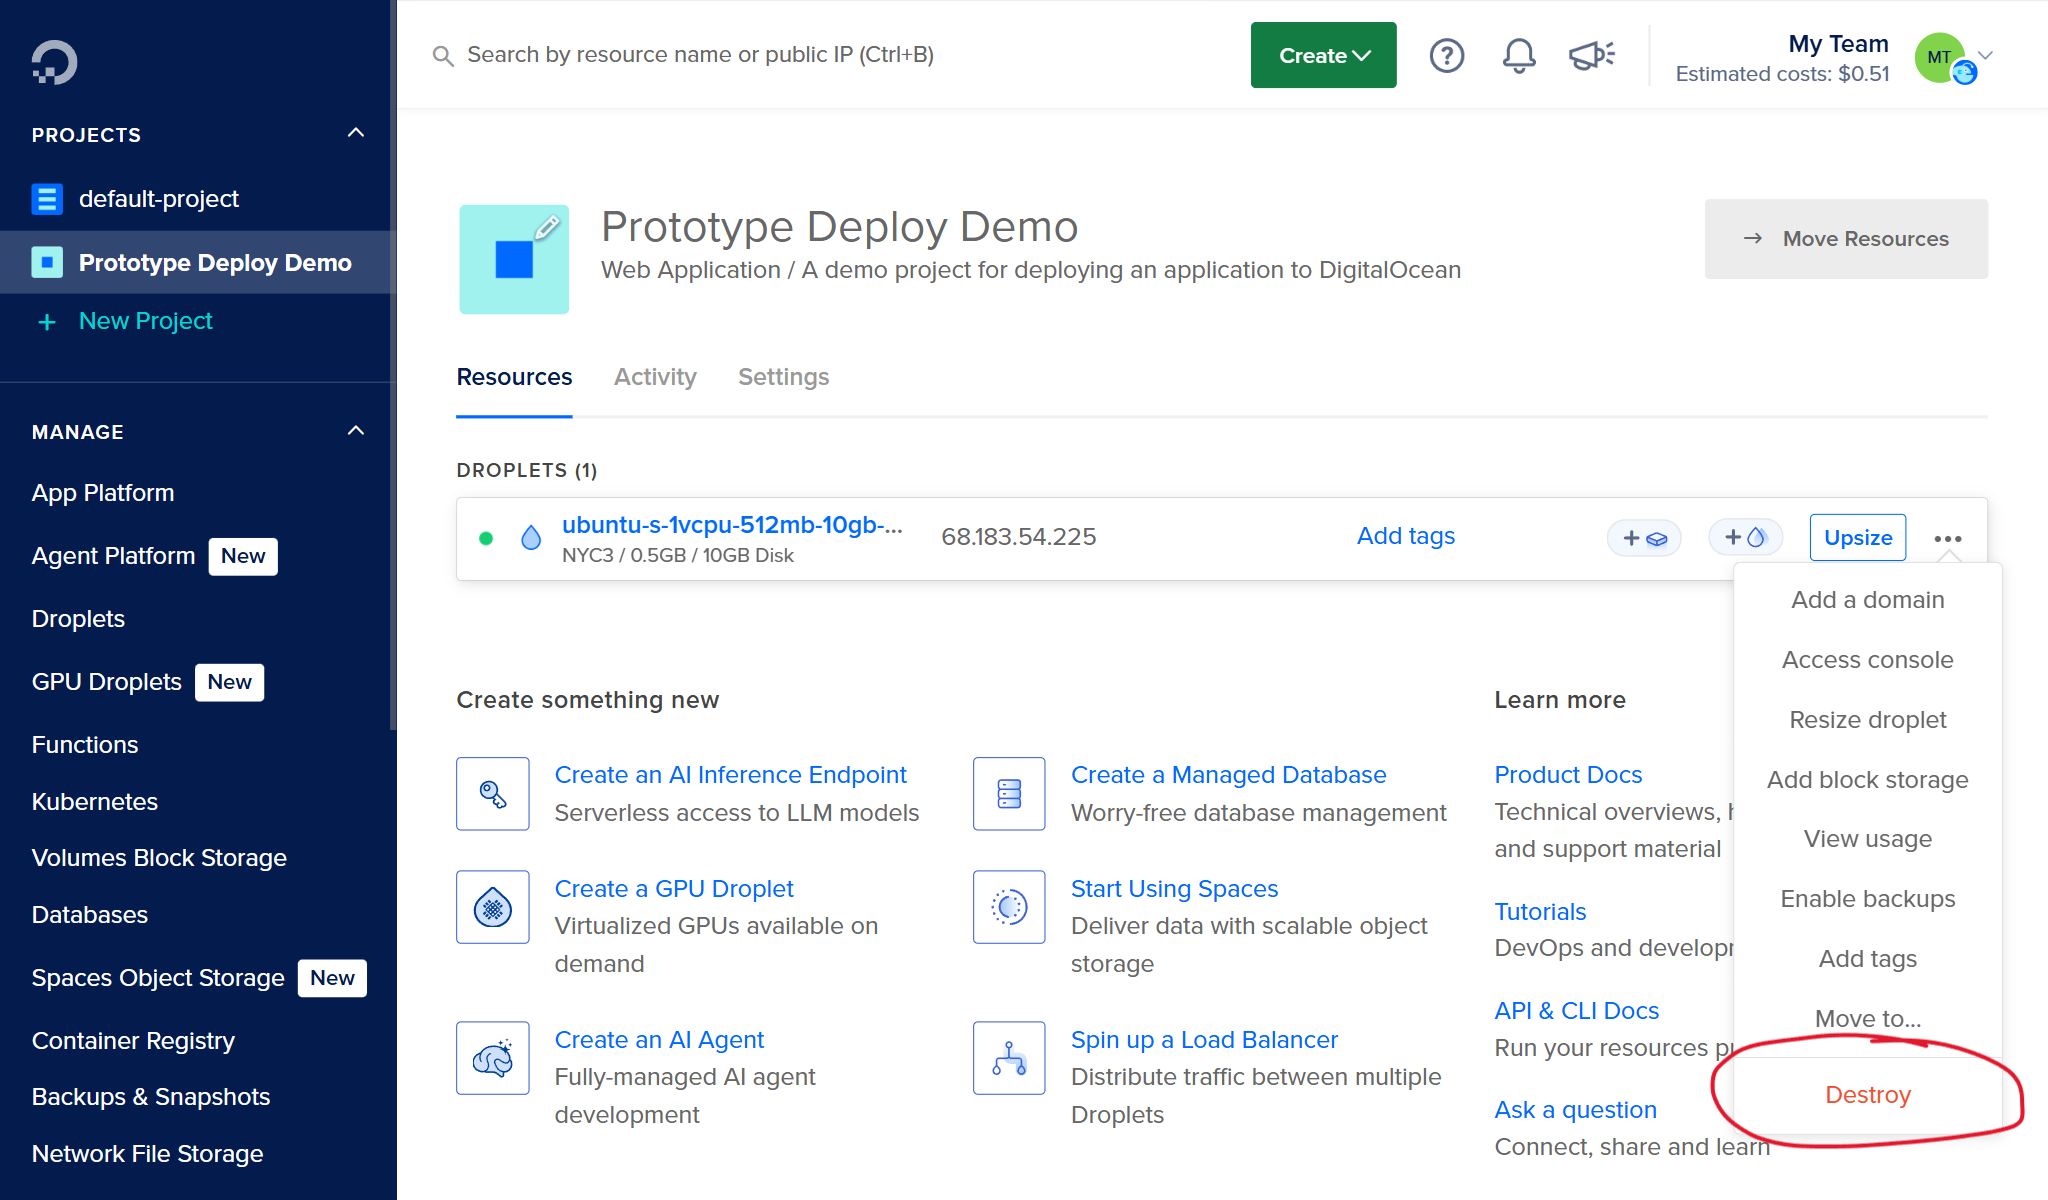
When you're done testing, delete your Droplet to stop charges:
- Go to your Droplet page in DigitalOcean
- Click Destroy -> Destroy this Droplet
- Confirm by typing the Droplet name
Next Steps
Security Hardening
This tutorial prioritizes speed over security. Before running any server beyond a few hours of testing, address these vulnerabilities:
User Permissions: Running as root means any exploit in your game server has full system access. Create a dedicated user with minimal permissions:
$ adduser --system --no-create-home gameserver
Update your systemd service file to run as this user by changing User=root to User=gameserver. Then reload and restart:
$ systemctl daemon-reload
$ systemctl restart gameserver
The --system flag creates a system user (no login shell, no home directory) that can't be used for interactive access. This limits damage if your server is compromised. Note that some guides suggest creating users with sudo permissions for server administration, but your game server user should explicitly not have these privileges.
Firewall Configuration: Your server currently accepts connections on all ports. Use UFW (Uncomplicated Firewall) to block everything except what you need:
$ ufw allow 22/tcp   # SSH
$ ufw allow 9000/tcp # Your game port
$ ufw enable
SSH Hardening: Disable password authentication and root login. Edit /etc/ssh/sshd_config:
PasswordAuthentication no
PermitRootLogin no
Then restart SSH:
$ systemctl restart sshd
Make sure you've added your SSH key before disabling password authentication, or you'll lock yourself out. See SSH hardening best practices for more details.
Automatic Security Updates: Configure unattended-upgrades to automatically install security patches:
$ apt install unattended-upgrades
$ dpkg-reconfigure -plow unattended-upgrades
Infrastructure as Code
Manual server setup doesn't scale. Once you validate your prototype works, codify your infrastructure:
Terraform lets you define your entire server setup as code. Instead of clicking through DigitalOcean's UI, you write a configuration file that creates Droplets, configures firewalls, and sets up DNS. Your entire infrastructure becomes reproducible and version-controlled. Start with DigitalOcean's Terraform provider documentation.
Docker packages your server and all its dependencies into a container. This eliminates "works on my machine" problems and makes it trivial to run your server anywhere: locally, on DigitalOcean, or on any cloud provider. Deploy to a Docker-enabled Droplet or use DigitalOcean's App Platform for managed hosting. See Docker's getting started guide.
Production-Ready Game Servers
This approach works for a handful of concurrent players, but real multiplayer games need:
- Geographic distribution to reduce latency for global players
- Automatic scaling to handle traffic spikes
- Matchmaking to connect players efficiently
- Fleet management to optimize resource usage
Specialized game server hosting platforms can solve these problems out of the box. Check out Rushdown's guides on Amazon GameLift, Hathora, and Edgegap for production-grade solutions.