Hathora: Globally-scalable Game Servers in an Afternoon


Hi friends, at Rushdown we pride ourselves in staying on the cutting edge of game tech. Multiplayer games are at the center of our co-dev specialization and in this series we're aiming to share how to get up and running with popular game server orchestration platforms. In our previous post in this series we walk you through setting up Amazon GameLift in an afternoon, check it out here: Amazon GameLift Servers post.
Introduction Why Hathora, Why This Post
Hathora is a powerful managed service for hosting multiplayer game servers - handling session management, autoscaling, fleet health, and global deployment for you. Since their launch, they've also added additional hosting for build farms and GPUs, but that's beyond the scope of this post. Hathora prides itself on ease of use, which in our experience it delivers on. If you’ve ever wrestled with server orchestration or flaky production servers, Hathora might be for you.
Hathora’s documentation is generally pretty comprehensive, though it might take some digging to familiarize yourself with key concepts and get a working demo.
This post is for engineers that want to kick the tires and get something working fast without understanding every nuance of Hathora’s product offering. Our goal:
Pre-Requisites
Golang
Our sample game client and game server utilize Golang. To run them you’ll need Go 1.24+, which can be downloaded here.
Raylib
Our sample game client utilizes Raylib. You can follow the instructions on the gen2brain/raylib-go GitHub repo to install it.
(Optional) Docker
Hathora uses Docker, which is a technology that allows you to package your server project in a portable way so that it can be run in any Linux environment. While running Docker on your machine is not a requirement to completing this guide, it’s useful to be able to run your game server using the same underlying technology that Hathora uses.
Docker Desktop is the easiest way to install Docker. Select your OS to follow the specific installation instructions for your set up. Once you download it and install it you must run it as well.
Initial Hathora Set Up
Hathora offers various plans, but the “Explore” tier is free to use for testing purposes! With it you will be able to use up to 100 vCPU hours per month.
Step 1: Create a Hathora Account
If you don’t already have a Hathora account, you’ll need to create one.
Step 2: Create a Hathora Application
See also: Hathora Entities
Next, we’ll lay the foundation for the next step by creating an “Application” on the Hathora dashboard. An application is the top level namespace representing different environments (e.g. dev, staging, prod). Applications group all other entity types together.
- On the Hathora dashboard, navigate to https://console.hathora.dev/application/create
- Enter a name for your application (e.g.
hathora-demo) - Select “Direct endpoint” for your connection mode
- Select “Create Application”
- Note the application ID, as you will need it later.
Step 3: Create a Hathora API Token
You have two options for using API tokens to interact with Hathora. For either, you will first need to navigate to the tokens section of the Hathora dashboard: https://console.hathora.dev/tokens
- Option 1: Make note of your personal token, which you’ll use to test out Hathora’s offering
- Option 2: Create an API token and make note of it. This token will be long lived (we recommend using this token only for production workflows. When creating it, use the principle of least privilege for it’s scopes)
(Optional) Step 4: Download the Hathora CLI
You don’t need the Hathora CLI to set up your game server, but if you prefer to use it rather than the Hathora Console, you may install it by referring to the Hathora CLI tool docs.
Step 4: Configure Your Environment Variables
Using the values that you noted in previous steps, we’re going to configure environment variables. These will later be used when utilizing the Hathora CLI or when making API requests to provision game servers.
export HATHORA_APP_ID="your_app_id"
export HATHORA_TOKEN="your_api_token"
Linux Version
$Env:HATHORA_APP_ID="your_app_id"
$Env:HATHORA_TOKEN="your_api_token"
PowerShell Version
Hello, World: A Minimal Hathora Demo
To keeps things approachable, we’re starting with a barebones multiplayer setup - simple enough to grasp quickly, but complete enough to deploy and test with Hathora. We’re intentionally skipping advanced topics like matchmaking and autoscaling for now; the focus is just on getting a server deployed and talking to clients.
Sample Server
One of the things that makes Hathora easy to ramp up on is the decision to not require any SDKs or library integrations into your game server code in order to deploy them on the platform. This means that any game server is already set up to be deployed on Hathora.
Our sample server is written in Go. The server does the following:
- Listens for TCP connections on port 9000
- Accepts JSON position updates from players
- Maintains shared state of all player positions
- Broadcasts the current state to all players every 100ms
It’s not a full game, but it covers the fundamentals: connecting clients and synchronizing state.
Sample Client
We have two options for clients:
- Graphical Client (Raylib): Controls a cube in 3D space. This is overkill for our purposes, but it’s way more fun to play with than console output.
- Mock Client: Simulates a player moving in a circular path. This can be handy when you want to test multiple players moving around.
You don’t need a full game to evaluate Hathora — just enough networking to validate the server flow.
Goal: Running the Sample Locally
Before moving on, let’s make sure you can successfully clone, build, and run the server and client.
# Clone the repo via HTTPS
$ git clone https://github.com/Rushdown-Studios/HathoraDemo.git
remote: Enumerating objects: 1234567, done.
...
Filtering content: 100% (3/3), 12.34 MiB | 5.67 MiB/s, done.

# cd into the root of the repo
$ cd HathoraDemo/
(Option 1 - Easy) Running The Server
You can run the server directly without any additional dependencies.
# Run the server
$ go run ./cmd/server
2025/10/06 10:51:26 Server listening on :9000
(Option 2 - Advanced) Running The Server
Alternatively, you can run the server using the same underlying technology that Hathora will run it with; Docker.
# Build a Docker image tagged "hathora-demo"
$ docker build -t hathora-demo .
$ docker run -p 9000:9000 hathora-demo
Running The Clients
Once the server is running, you can run clients in separate terminals:
# Mock client
$ go run ./cmd/mockclient
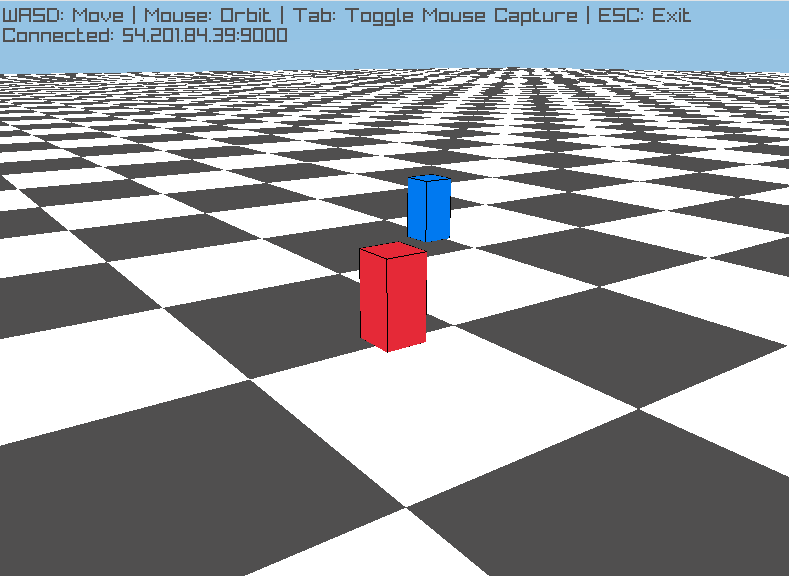
# Graphical client (WASD + mouse)
$ go run ./cmd/client
You should be able to control a little red cube with third-person WASD and mouse controls. If you start multiple clients, you should be able to see other clients moving around as blue cubes. If you started the mock, you should see an extra player trace out a circle in the middle of the "map".
Configuring Your Server on Hathora
Step 1: Clone the Sample Repo
If you haven’t already cloned the sample repo, do so now:
# Clone the repo via HTTPS
$ git clone https://github.com/Rushdown-Studios/HathoraDemo.git
remote: Enumerating objects: 1234567, done.
...
Filtering content: 100% (3/3), 12.34 MiB | 5.67 MiB/s, done.

# cd into the root of the repo
$ cd HathoraDemo/
Step 2: Build, Upload, and Create a Deployment
See also: Deploy on Hathora Cloud and Hathora Entities
Next, we’ll prepare the server and upload it to our Hathora Application. Hathora requires a .tar.gz archive to create build. We will create that in the build/ directory:
$ tar -czf build/hathora-demo.tar.gz --exclude="build" .
(Option 1 - Easy) Use The Hathora Dashboard
Note: The configuration values listed below are to support the demo application we have provided. If you are using your own game server, you may need to adjust this configuration accordingly.
- On the Hathora dashboard, navigate to the Application that you created before and upload your
hathora-demo.tar.gzfile. - When configuring process resources, select
- 1 CPU Core / 2GB of Memory
- 1 Room Per Process
- When configuring Transport:
- Port: 9000
- Transport type: TCP
- You may keep the environment variables list empty and the idle timeout enabled
(Option 2 - Advanced) Use The CLI To Create a Build and Deployment
See also: hathora deploy docs
If you set up the CLI, you can use it to create a Build and a Deployment in Hathora. The easiest way to do this with the CLI is using the hathora deploy command.
hathora deploy \
        --file build/hathora-demo.tar.gz \
        --rooms-per-process 1 \
        --container-port 9000 \
        --transport-type tcp \
        --requested-memory-mb 2048 \
        --requested-cpu 1 \
        --app-id $HATHORA_APP_ID \
        --token $HATHORA_TOKEN
Linux Version
hathora deploy `
        --file build/hathora-demo.tar.gz `
        --rooms-per-process 1 `
        --container-port 9000 `
        --transport-type tcp `
        --requested-memory-mb 2048 `
        --requested-cpu 1 `
        --app-id $Env:HATHORA_APP_ID `
        --token $Env:HATHORA_TOKEN
PowerShell Version
If you are interested in more advanced deployment options, refer to the hathora deployment create and hathora build create docs.
Make note of your DeploymentID and BuildID
export HATHORA_BUILD_ID="your_build_id"
export HATHORA_DEPLOYMENT_ID="your_deployment_id"
Linux Version
$Env:HATHORA_BUILD_ID="your_build_id"
$Env:HATHORA_DEPLOYMENT_ID="your_deployment_id"
PowerShell Version
Goal: Connecting Clients
Once you have a deployment configured, we’re ready to spin up servers to host games. Hathora uses “Rooms” to manage server processes. In our configuration a room has a 1:1 mapping with game server processes.
(Option 1 - Easy) Start A Room Via The Dashboard
- On the Hathora dashboard, navigate to the Application that you created before and click “Create room”, selecting the region that is geographically closest to you. You will see a new entry in the “Recent processes” table.
- Click on the process you just started. Make note of the “Connection info” on the left hand side of the page.
- The
hostis everything to the left of the: - The
portis everything to the right of the:
- The
(Option 2 - Advanced) Start A Room Via The Command Line
The Hathora CLI does not contain functionality to create a room directly. Instead, you will need to issue a request to the Hathora API to create a room. Documentation for this endpoint can be found here. In most production cases, you will call the CreateRoom API from your matchmaker or similar backend service. Hathora provides many SDKs to help streamline this integration (e.g. Unreal, Unity, Java, Go, TypeScript).
# Create Room
curl -X POST "https://api.hathora.dev/rooms/v2/$HATHORA_APP_ID/create" \
  -H "Authorization: Bearer $HATHORA_TOKEN" \
  -H "Content-Type: application/json" \
  -d "{\"deploymentId\": \"$HATHORA_DEPLOYMENT_ID\", \"region\": \"Seattle\"}"

# Prepare for Next Query
export HATHORA_ROOM_ID="your_room_id"

# Query Connection Details
curl "https://api.hathora.dev/rooms/v2/$HATHORA_APP_ID/connectioninfo/$HATHORA_ROOM_ID" \
  -H "Authorization: Bearer $HATHORA_TOKEN"

# Make Note Of Your Room ID and Process ID
export HATHORA_ROOM_ID="your_room_id"
export HATHORA_PROCESS_ID="your_process_id"
Linux Version
# Create Room
$body = @{
    deploymentId = $Env:HATHORA_DEPLOYMENT_ID
    region = "Seattle"
} | ConvertTo-Json

Invoke-RestMethod -Uri "https://api.hathora.dev/rooms/v2/$Env:HATHORA_APP_ID/create" `
    -Method POST `
    -Headers @{Authorization = "Bearer $Env:HATHORA_TOKEN"} `
    -Body $body `
    -ContentType "application/json"

# Prepare for Next Query
$Env:HATHORA_ROOM_ID="your_room_id"

# Query Connection Details
Invoke-RestMethod -Uri "https://api.hathora.dev/rooms/v2/$Env:HATHORA_APP_ID/connectioninfo/$Env:HATHORA_ROOM_ID" `
    -Method GET `
    -Headers @{Authorization = "Bearer $Env:HATHORA_TOKEN"}

# Make Note Of Your Room ID and Process ID
$Env:HATHORA_ROOM_ID="your_room_id"
$Env:HATHORA_PROCESS_ID="your_process_id"
PowerShell Version
Connect Clients
- Now, you can configure clients to connect to your server in new terminal windows
# Mock client
$ go run ./cmd/mockclient --host {your_hathora_host} --port {your_hathora_port}

# Graphical client (WASD + mouse)
$ go run ./cmd/client --host {your_hathora_host} --port {your_hathora_port}
- You’ll notice as you connect that the stats on the Hathora dashboard update in real-time! You will also see and be able to download logs from your game server on that page
Debugging
Hathora makes it easy for you to know what’s happening with your game servers!
- You can look at the dashboard to drill down into metrics and logs for particular game processes
- If you want to tail logs locally, you can use the CLI
hathora log \
  --app-id $HATHORA_APP_ID \
  --process-id $HATHORA_PROCESS_ID \
  --follow
Linux Version
hathora log `
        --app-id $Env:HATHORA_APP_ID `
        --process-id $Env:HATHORA_PROCESS_ID `
        --follow
PowerShell Version
Clean Up
The idle timeout should automatically terminate server processes that hold no connections for 5 minutes. If you want to manually terminate them earlier, you can do so by clicking on the process in the dashboard and selecting “Stop process” on the right hand side.
What’s Next?
Now that you have a deployment up and running, here are a few next steps and tools worth checking out:
- Hathora Entities - Entities are the core components of Hathora. Now that you have things up and running, getting a deeper understanding of these components will help you know how you can customize your configuration
- Match Flow Architecture - For the purposes of this post, we manually created “Rooms”. In a typical game your matchmaker would instead facilitate creating these rooms when matches are available
- Fleets and Autoscaling - Pro and Enterprise customers can utilize automated autoscaling configurations to ensure that your game server deployments are scaling to meet the needs of your game globally. Hathora will automatically scale servers up ahead of demand in order to ensure when matches are made, they are fulfilled quickly.
- Hathora Cloud API - Virtually every operation that Hathora allows is exposed via an API. This can be used to integrate your matchmaker and/or integrate your CI/CD pipeline to automate build uploads
- Game Engine Integration Guides - Hathora provides additional guides and samples for commonly used game engines